Data sources
Add Data Sources
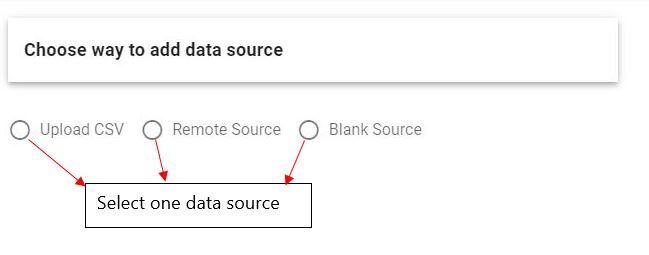
GOFR supports various data sources including:
- CSV as a file source,
- Remote connections to DHIS2 and FHIR servers.
- Blank Sources
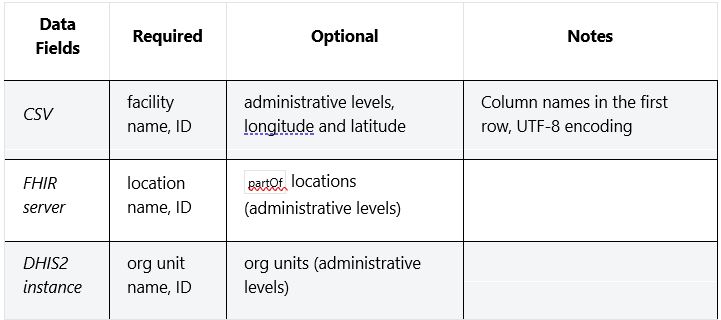
The following table displays the various fields required for each source to be added:
To add a data source in GOFR :
On the Navigation pane,select Data Sources -> Select Add Data Source ->
Upload CSV
In order to successfully upload a CSV file into GOFR
- The CSV file should have headers (column names) on the first row of the file.
-
Empty lines should be removed.
-
The CSV file should be encoded as Unicode (utf-8) as that is what is used internally in the backend.
If some entities are encoded in another format then matches that appear to be the same may not match as expected.
Latitude and longitude are optional columns. If they are included they will be used to facilitate manual matching but they are not used or required for automatic matching.
To upload a CSV:
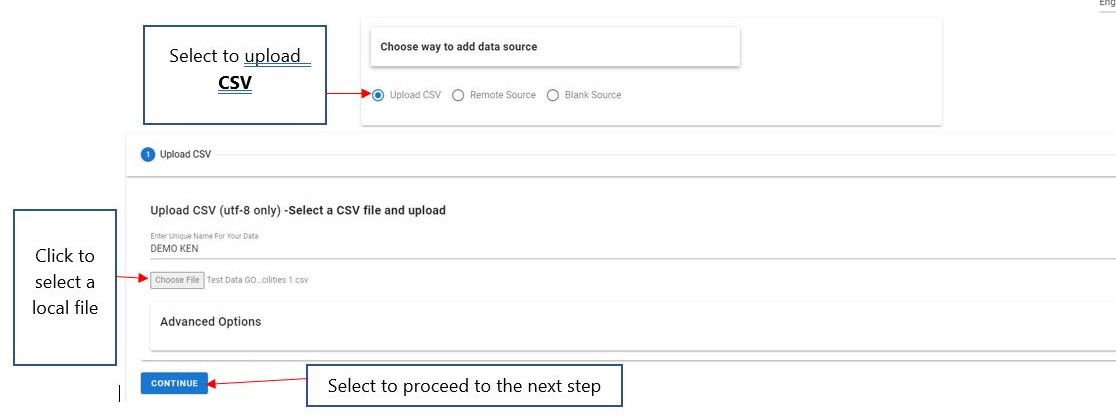
Select Data Sources -> Add Data Sources -> Select Upload CSV -> Select a file and enter the file name -> Continue
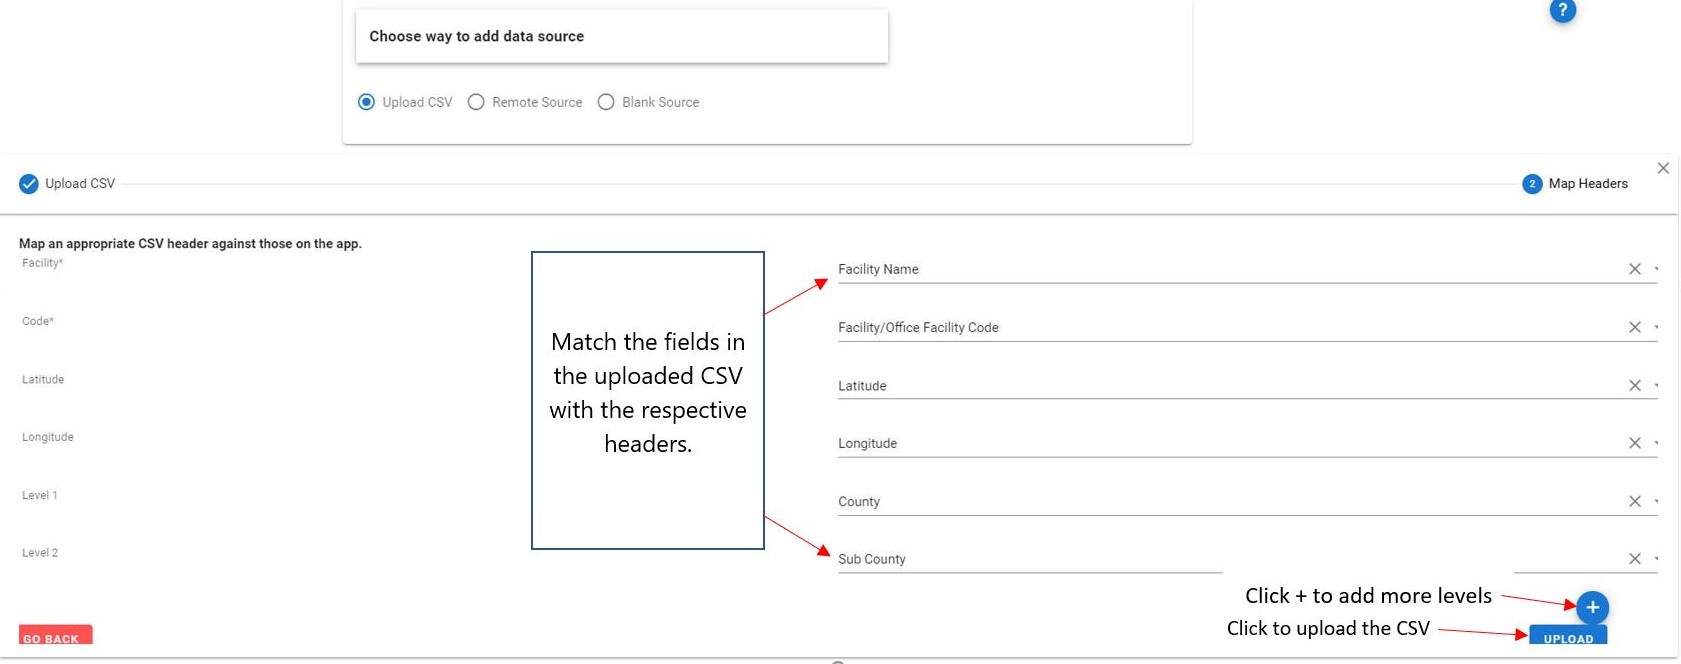
The next step entails mapping the headers on the CSV file uploaded against the headers in the GOFR system:
Match Headers
Select the matching headers -> Click upload
The user may choose any levels in their hierarchy to include but they must be ordered with the top most level first.
Click on the + button to add more levels and map them to the appropriate levels in the app -> Upload
Ensure that all the column levels selected have data for all the facilities.
The CSV file will not be uploaded in case of missing data.
It is also possible to select no levels to match on a flat list with no hierarchy. To do so, don’t select levels.
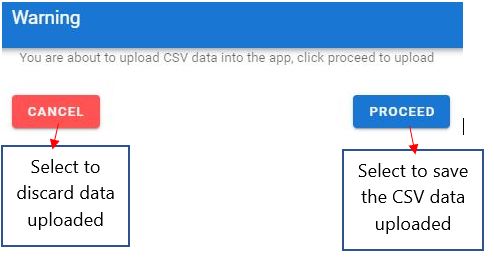
On uploading, the following warning appears:
Click Proceed to continue uploading or click Cancel, to discard.
Remote Data Source
GOFR supports remote sources of data. Any DHIS2 or FHIR server can be used as a source if the user has credentials to access it.
Extensive compatibility testing has not been performed but DHIS2 versions >=2.22 should be supported. Please contact the maintainers if there is an issue.
FHIR is supported for STU3 and R4 support is anticipated.
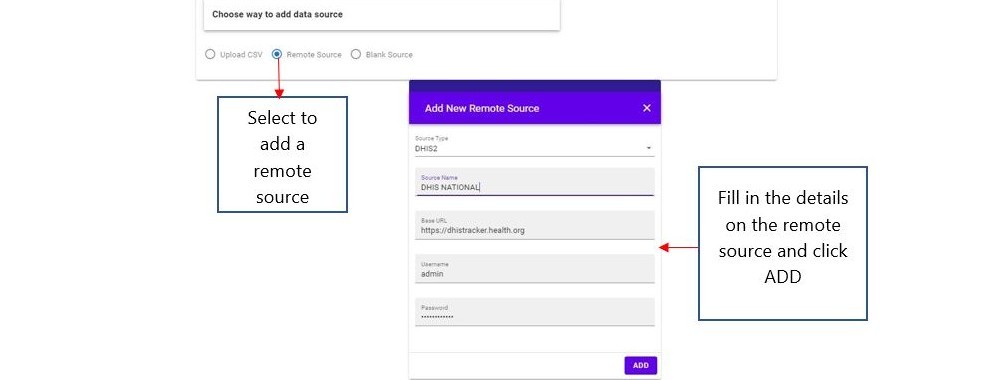
To add a remote data source:
Select Remote Source -> Fill in the source type -> Source name -> Base url -> Username -> Password -> Click Add
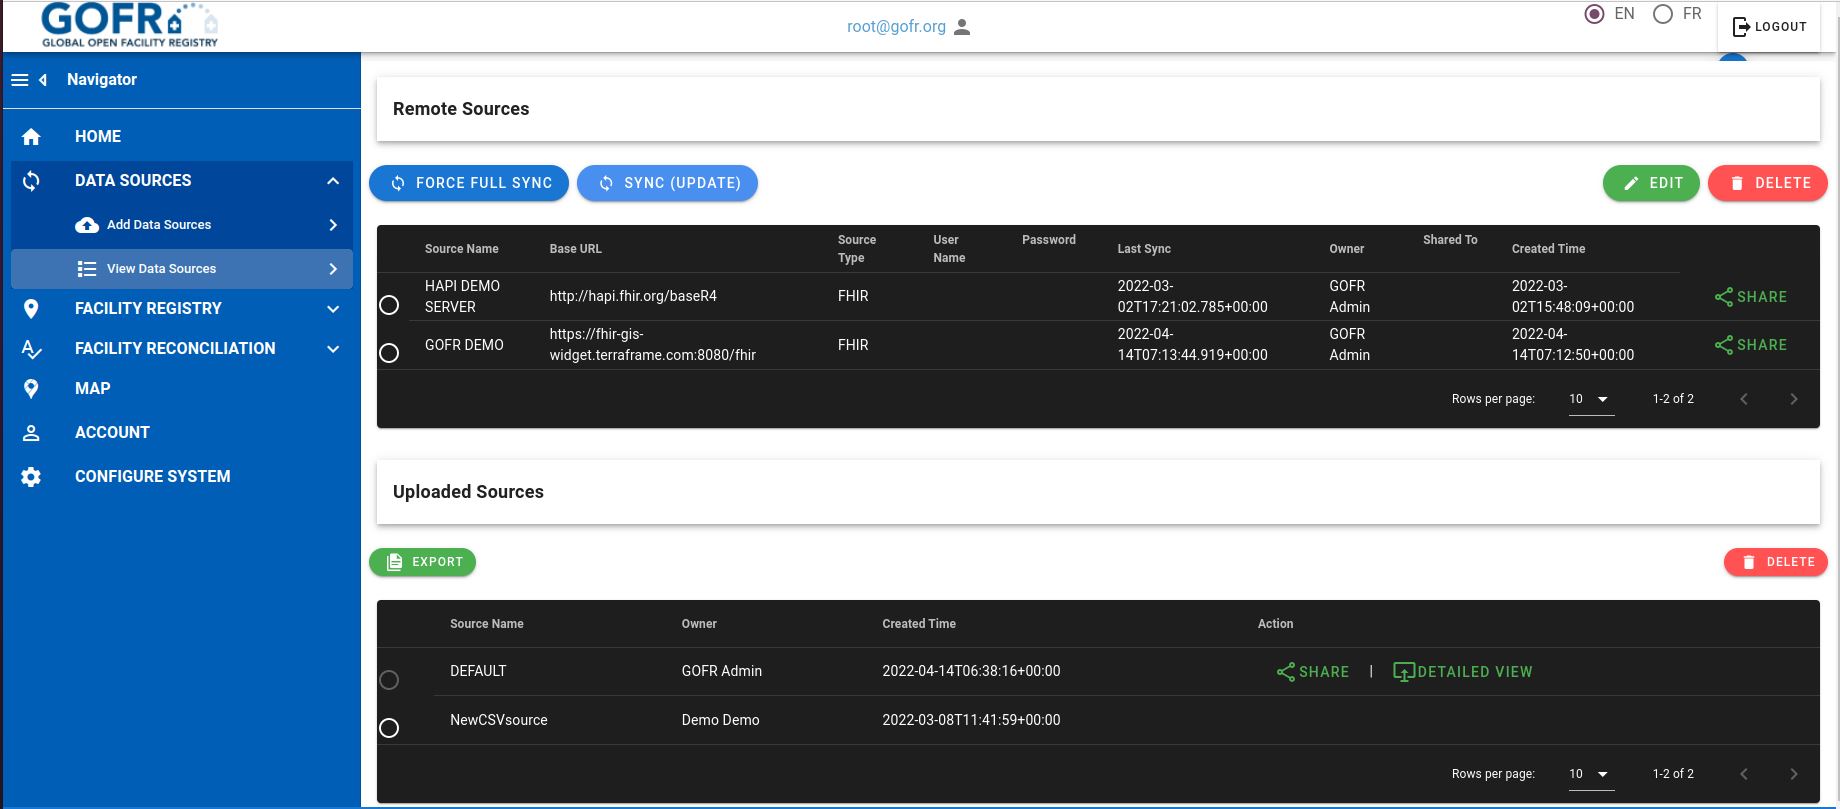
After adding a remote source, users MUST run the synchronization so that the data can be pulled.
This is done in the View data sources feature.
View data sources -> remote sources -> select the data source and click on 'Force full sync'.
Blank Source
Blank data sources can also be added. A blank data source can be manually populated with data by activating it on the dashboard and using the facility registry functionality to populate its contents
To add a blank source:
Select Blank Source -> Add the name of the source -> Click Add
Once uploaded, you can view all the uploaded sources under View Data Sources .
Force full Sync
Force full sync allows full synchronization of all the data from the remote source.All the data from the remote source is added.This should be done the first time a remote source is added, in order to populate data into the newly added source.
Sync Update
Sync Update only pulls new changes from the remote source, since the last synchronization was done. This means that any changes done in the system on the source are not overwritten by the synchronization.
CSV entries can be edited. Any edits do not modify the original data source but the edits will be exported after reconciliation.
